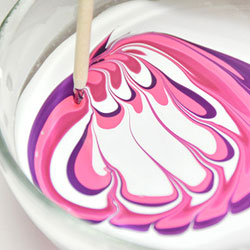
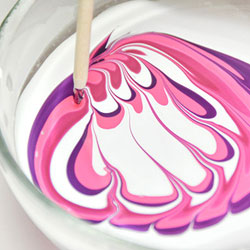
Water Marble is a special nail art technique. It is about obtaining with water, a marbling effect on the nail. This technique was originally used in painting. Transposed to Nail Art, it first started in Japan, then spread to the United States, and across the world. Whether you do it at a nail technician, or on your own, the Water Marble will please you.
In the following example, we suggest the creation of a beautiful pink Water Marble, make sure that you have the right manicure and pedicure set to take good care of your nails before make a Water Marble.

NECESSARY MATERIAL
-A base
-A brush
-Solvent
-White varnish
-Pastel pink and fuchsia pink nail polish
-Masking tape
-Pliers
-A bowl
-A toothpick
-A small wooden stick
TECHNIQUE TO FOLLOW
Start by applying a base coat to your nails to protect them. Once dry, apply a coat of white varnish. Clean the outline with the brush and nail polish remover. Let your varnish dry for 5 to 10 minutes. It doesn’t have to be very dry.
Protect the entire contour of your nails with masking tape. You can also do this with scotch tape, but the masking tape is less sticky. Don’t forget to protect the cuticles as well.
Take a bowl of water, and put a few drops of pastel pink and fuchsia pink polish in it. Carefully arrange the drops in the center of the jar, so that they spread out. For this Water Marble, it will be necessary to generously apply the drops of varnish.
With the tip of the toothpick, draw lines from left to right and right to left so as to obtain a very tight marbling. Draw each line up to the glass wall of the bowl, to seal in the polish.
Continue, dipping a fingernail (in whatever varnish area you like), parallel to the surface of the water and blow on the varnish to freeze the pattern. Collect the excess polish in the bowl, with the small wooden stick. Using pliers, remove the masking tape. Finish by cleaning the area around the nail with the brush and nail polish remover.
Repeat the same technique for each nail.
ADVICES
Preferably use tap water at room temperature.
When you put the drops of varnish in the center of the bowl, you have to go really fast, otherwise the varnish may set, and the drops will not spread over each other.
Clean your toothpick between each line of the marbling, so that the pattern is as clean as possible.
Use the top coat as a final layer to maintain your pattern properly.
Read also: Effective product against soft nails: hardening varnish
Source:
